Living room update on a budget, sound impossible!
I took two days and transformed my living room using things I already had around the house and was able to give new life to items I owned and DIY a few things with supplies I had around the house. I documented the process on my Instgram page if you are interested in seeing more you can check it out in my highlights.

Living Room Update Mood Board
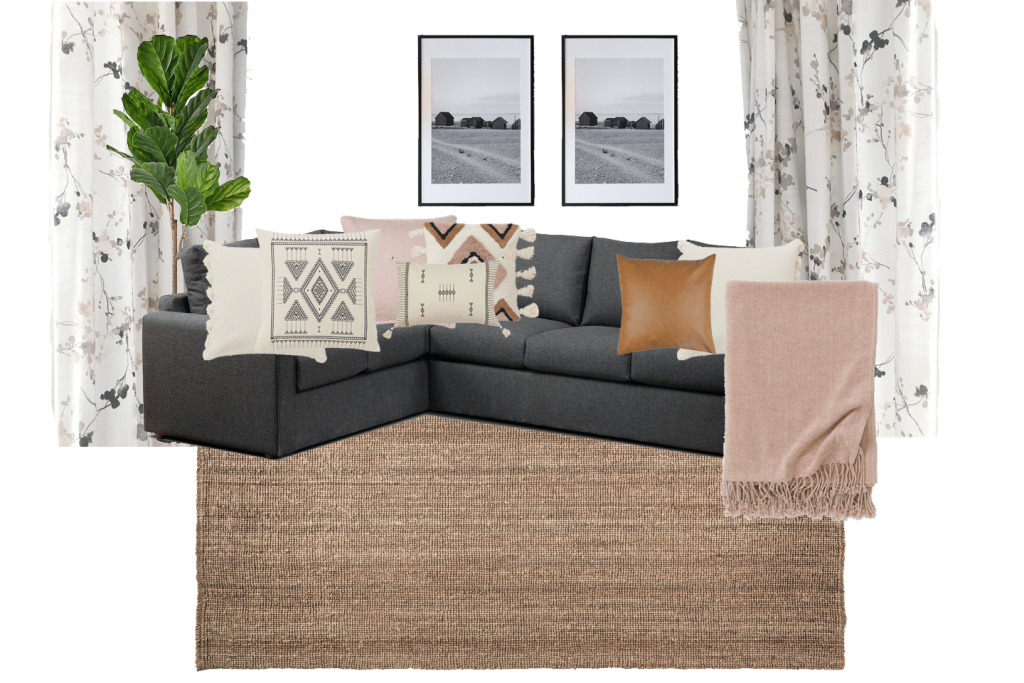

Before I started I created a mood board in Photoshop using pictures of items I already owned as well and adding in a few new items. This was helpful for me to be able to visualize the space, allowing me to purchase only a few things to help coordinate all the colours, and shopping my own home for everything else. I was able to see themes, colours and feel before I even began.
Fresh Coat of Paint


When we added our DIY shiplap to the walls of this room I skipped one very important step, primer! I bought a paint and primer in one, and thought this would work out just fine, but after two years of the shiplap being up on the wall all I can see is yellow!
So the first thing I did to update this space was to prime and paint the shiplap walls. Never again will I skip this step!
Adding Curtain and Curtain Rods

The curtains that I used for this space came from our fireplace room. The curtains didn’t work for the fireplace room because it is a colder room and we need a thicker curtain up there. I thought I would try them out in this space first before donating them.
The curtains ended up matching the living room couch perfectly as well as creating a cozy feel by adding texture and layers.
Coffee Table and Side Table


Greg built our round coffee table a few years ago, so it fit this space perfectly. But because I wanted to show different options for this space I swapped out the round coffee table my grandpa’s box.
My grandpa emigrated from Scotland with all of his possessions gathered in this box. This box was used as a coffee table in my childhood home, as my grandpa had given it to my dad. A few years ago my dad brought it to our house so we could use it. I think it fits perfectly in this space now and I love the added sentimental aspect.
The side table was one of the first DIY projects Greg and I undertook in our old house. The previous owner had left it, so we painted the legs white and added a wooden pallet top. I removed the pallets, added a fresh coat of paint and now we have a new side table!
Artwork for Living Room Update

Using frames I already had I was able to DIY my own abstract artwork to fill them. This allowed me to pull my colour scheme together without having to purchase anything. I simply went on Pinterest, found something I liked, and mimicked the style I liked using leftover paint and chalk I had on hand.
I also added artwork I already owned to the fireplace mantel. Switching up the placement of artwork you already own gives you a new appreciation, allowing you to love it all over again.
Cushion Covers
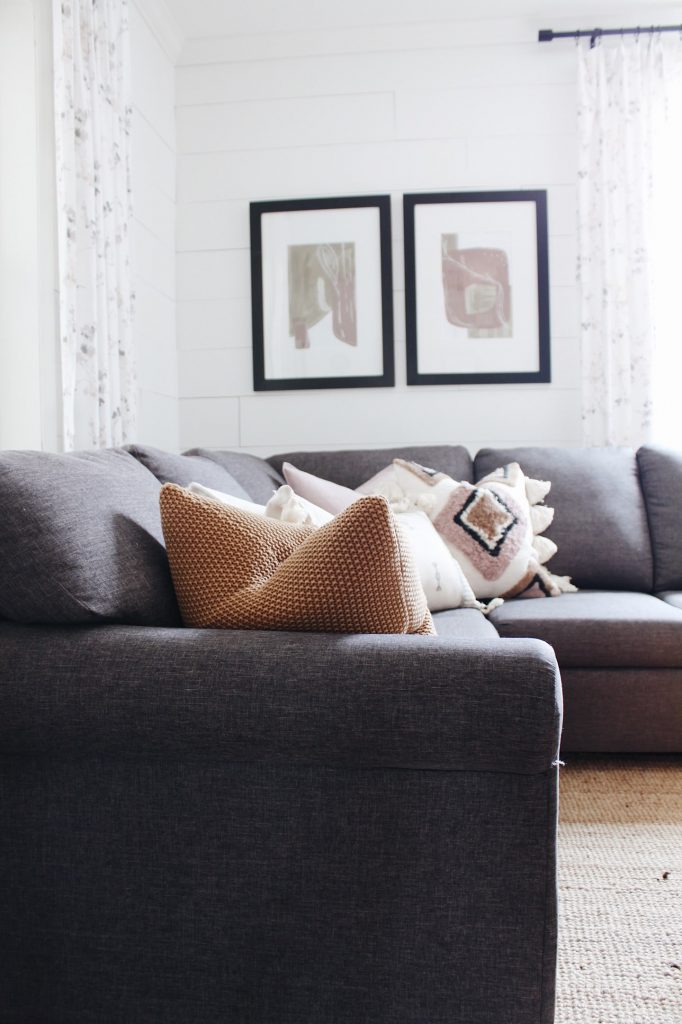
Swapping cushion covers is a super easy way to change the look of any space. Instead of having to store multiple pillows, just purchasing the covers allows you to store off-season cushion covers in a linen closet and pull them out throughout the year for a new look and feel.
Pillows can be hard to coordinate when you purchase them from all different stores, so by creating a mood board I was able to see if my current pillows would match with the few that I was bringing in.
Swapping out the pillow covers helped to brighten the space and make it feel more like spring!
Plants Real and Faux
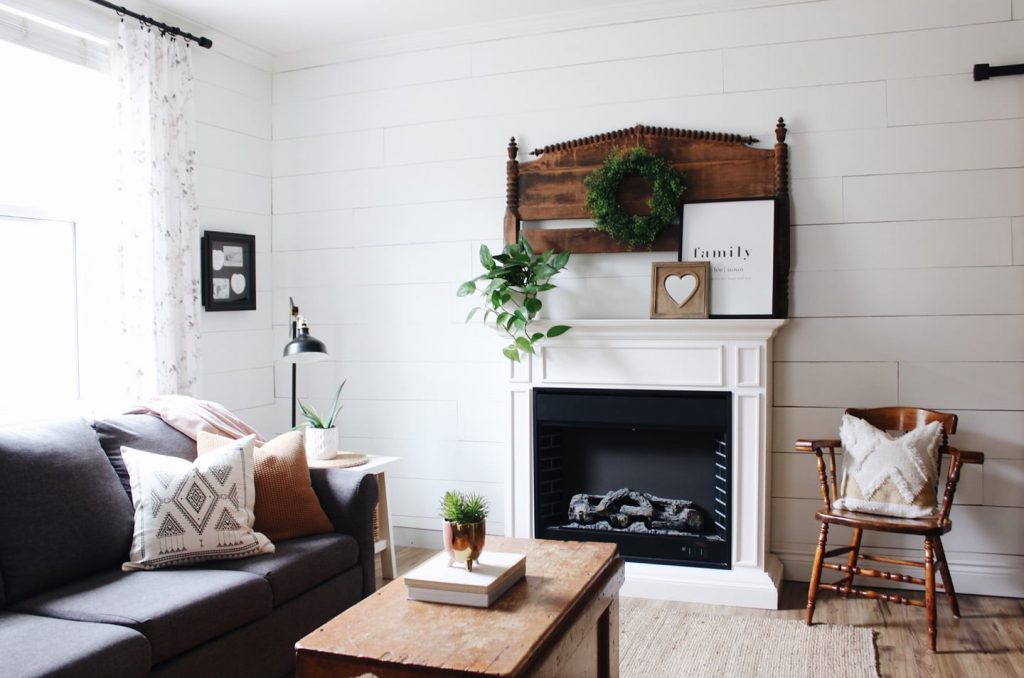
This room was filled with real plants, but not all of them were striving here. This room is south facing and gets direct sun in the afternoon. So swapping out the plants that were not striving and leaving the ones that were, allowed me to simplify this space.
I also added a spring wreath that I DIYed using materials I already had. The frame came off our dead winter wreath, and the faux foliage came from old faux plants. As I became more confident with my real plants I would remove the faux ones and reuse the pots for real plants.

You can do this too! Start with a plan, clear the area you are working with, remove everything allowing your eyes to see something new. Start with what you have; shop your own home.
Breath new life into previously loved items by using paint, moving the location of an item, DIY something new… and then when that is all done, if needed purchase just a few new items to freshen up the space.
SHOP THIS POST
More Before and Afters
Walkthrough Dining Room Update with Inspiration
How To Install Cabinet Hardware: Before and After Laundry Room
Remove Entryway Closet: Why It's Better Without It
Entryway Update Phase 1: Brightening the Entryway
PIN IT FOR LATER

I love how simple yet beautiful this is. Love the shiplap too!
Thank you Alexa!
Looks so beautiful. I love that you used your grandpa's box. It's just gorgeous and what a special memory.
Very cute! I love the greenery and pillows!
I love the antique trunk! And great idea putting the headboard over the mantle, it add's nice contrast as well.
Thank you, Maria, the truck is my grandfather's which makes it that much more cool to me 🙂
I love how you created this nice mood board first (I am a big fan of those) and then manifested this beautiful space in your home! It looks so fresh!
Thank you, Anja I never used to create mood boards but I am all for them now!